When connecting Hexicom to QuickBooks online we will require the API keys from QuickBooks, this enables the two systems to communicate. This article outlines this process.
There are 3 steps to obtaining the API keys.
Step 1 - Creating the App
Step 2 - Developing the App
Step 3 - Locate Keys & Send to Hexicom
To get your API keys from QuickBooks online, please follow the steps below.
Step 1 - Creating The App
1. Click the link https://developer.intuit.com/app/developer/dashboard then when prompted login with your QuickBooks Online account.
You will be prompted to join the Intuit Developer platform.
2. Click the tick box that you agree to their terms, then click Create account.
3. Click My Apps (along the top navigation bar). then, once you have opened the page, click the button + Create an app.
4. At the next screen, click QuickBooks Online and Payments (on the left).
5. Under "What's your app name?" type Hexicom.
6. Click the drop-down under Select a scope, select both items - Accounting and Payments (US only).
7. Click Create app button (at the bottom)

Now that the app has been created, it will redirect you to the apps main page.
Step 2 - Develop The App
Now that the app has been created, the next step is to develop the app, this will essentially verify Hexicom.
1. From the sidebar (on the left), under the Production section, click Keys & OAuth.
Production Key Requirements
Before you can get your API keys, it will request you to do four simple things, these are called the Production Key Requirements (indicated in red below).
A) - Verify your email address
1. Click the Verify your email address link.
2. On the following page, click the Resend Verification Email link at the top.
3. You will be redirected to your Intuit Account Settings page, click Verify email (next to the Email address field).
4. A pane will open, click the blue Send verification email button. Then go to your email and open the link to confirm your email address.
B) Complete your account profile
1. Click this link to return to the Intuit Developer dashboard - https://developer.intuit.com/app/developer/dashboard
2. Click My Apps (at the top), then select Hexicom from the list.
3. Under the Production section (on the left), click Keys & OAuth.
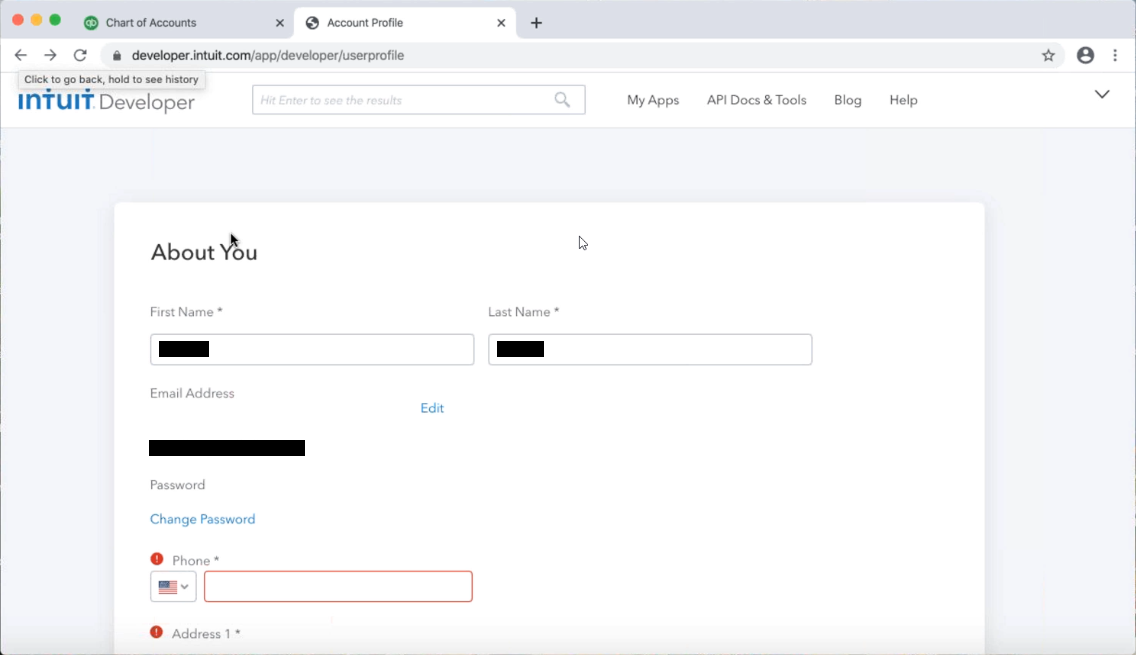
4. Then click Complete your account profile.

5. Complete any details that are missing, e.g. your business phone number, address, etc.

6. Scroll down, to the section "
Platform Interest" then select
QuickBooks Online.

7. Click
Save.
When these steps are completed you will be able to complete STEP C.
C) Provide EULA & privacy policy URL's in Production settings
1. Return to the Production Key Requirements list and click Provide EULA & privacy policy URLs in Production settings.

2. Clicking that link will send you here

3. Scroll down to the
Terms of Service Links section.
Note: Once you have entered the address, remain on this page (DO NOT SAVE just yet or navigate away) so the next step can be completed.
D) - Identify Target Apps
1. On the same page, scroll down to Target industries for this app.
2. In this section, check the box for None of the above.

3. Scroll to the bottom of the page, then click
Save.
Step 3 - Locate Keys & Send to Hexicom
Now you have confirmed all your information & will be able to send the details to Hexicom
1. Under the Production section (on the left).Click Keys & OAuth again.
You will now see a section called Keys.
This is where you will need to send to Hexicom the Client ID and the Client Secret.
Note: Leave this screen open.
2. Click the square icon at the end of those fields

, this should copy everything inside the field.
3. Copy and paste both the
Client ID and Client Secret values and send them to
Support
Note: It is important that you make sure you copy absolutely everything from these fields, if this information is incorrect the export function from Hexicom to QuickBooks will not work.
4. Return to the Client ID and Client Secret values page, scroll down to the Redirect URLs section.

6. Scroll down the page, then click
Save.
If you have any further questions, please contact Support.


